
1. Introduction
In modern web development, automation has become a cornerstone of efficiency and reliability. Static site generators like Hugo make it easy to build fast, lightweight websites, but deploying and managing them securely and consistently can be challenging without proper automation. That’s where Terraform, AWS, Cloudflare, and GitHub Actions come together to create a fully automated and secure deployment pipeline.
This article walks through the automation of a Hugo CI/CD pipeline using Terraform to provision cloud resources and GitHub Actions to handle continuous integration and delivery. The pipeline builds Hugo’s static files, uploads them to Amazon S3, and serves them globally through CloudFront with SSL certificates managed by AWS Certificate Manager (ACM). Finally, Cloudflare is used to map a custom subdomain to the CloudFront distribution, ensuring global accessibility and security via DNS and SSL integration.
By the end of this guide, you’ll understand how each Terraform module - storage, network, security, and cloudflare - fits together to form a complete infrastructure-as-code solution. You’ll see how to securely connect GitHub Actions to AWS using OpenID Connect (OIDC), and how the modular Terraform approach keeps the setup scalable, maintainable, and reusable across projects.
2. Project Structure and Module Overview
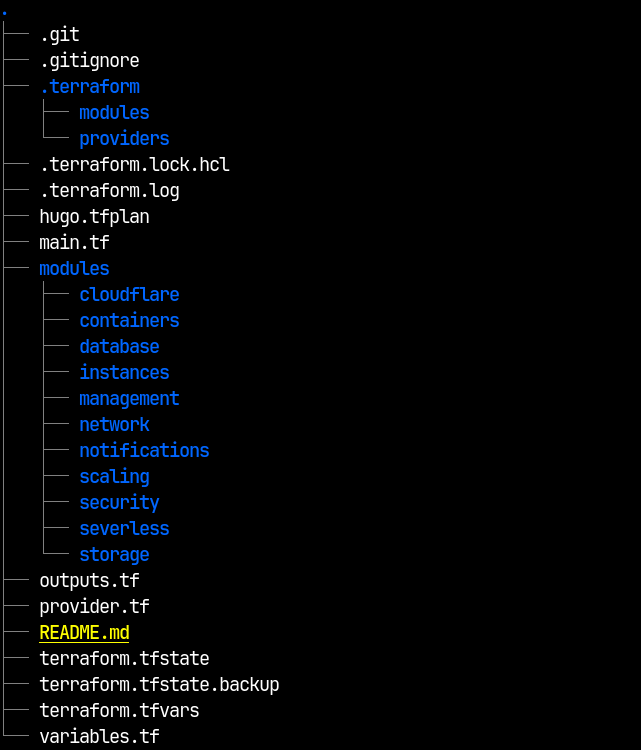
Before diving into the implementation, it’s important to understand how the Terraform configuration is organized. The project follows a modular design, where each core component of the infrastructure - storage, networking, security, and DNS - is defined as an independent Terraform module. This structure improves readability, reusability, and scalability, allowing you to make updates to one part of the infrastructure without affecting the others.
At the heart of the setup is the main.tf file, which serves as the orchestrator for all the modules. It defines how these modules interact, passing outputs from one module as inputs to another. For instance, the storage module creates the S3 bucket that hosts the Hugo-generated static files, and the network module consumes its details to configure a CloudFront distribution for global delivery. Similarly, the security module defines the IAM roles and OIDC permissions needed for GitHub Actions to deploy securely to AWS, while the cloudflare module manages DNS and SSL integration for the public-facing domain.
Each module encapsulates a specific function:
- Storage Module: Handles S3 bucket creation and access configuration for static site hosting.
- Network Module: Sets up CloudFront for content delivery and configures SSL certificates via AWS ACM.
- Security Module: Manages IAM roles, policies, and OIDC trust relationships for secure GitHub Actions deployments.
- Cloudflare Module: Connects Cloudflare DNS records to the CloudFront distribution and manages domain SSL validation.
This modular approach keeps the Terraform configuration clean, easier to maintain, and ideal for CI/CD workflows where each component can evolve independently. In the next sections, we’ll explore each module in detail and examine how they integrate to form a fully automated deployment pipeline for a Hugo website.
3. Configuring AWS for Secure GitHub Actions Access (Terraform Setup)
Before automating deployments with GitHub Actions, we first need to create the AWS resources that will enable secure authentication and object storage for our Hugo site. This foundation ensures that GitHub can deploy to AWS without static access keys, using OpenID Connect (OIDC) instead.
The Terraform configuration below lives in the security and storage modules, forming the security and storage backbone of the CI/CD pipeline.
3.1. Establishing OIDC Trust Between GitHub and AWS
We start by defining an OpenID Connect (OIDC) provider in AWS that recognizes GitHub as a trusted identity source. This allows GitHub Actions workflows to assume roles in AWS using temporary tokens rather than permanent credentials.
variables.tf (security module):
| |
main.tf (security module):
| |
This resource registers GitHub’s identity provider (token.actions.githubusercontent.com) with AWS. The thumbprint_list ensures the TLS certificate used by GitHub is valid and trusted.
3.2. Creating the IAM Role for GitHub Actions
Next, we define an IAM role that GitHub Actions will assume during deployment. The trust policy allows GitHub’s OIDC provider to assume the role, but only for a specific organization and repository.
| |
This configuration limits access to a specific repository, enforcing the principle of least privilege. Only workflows running in that repository can assume this role via OIDC.
outputs.tf:
| |
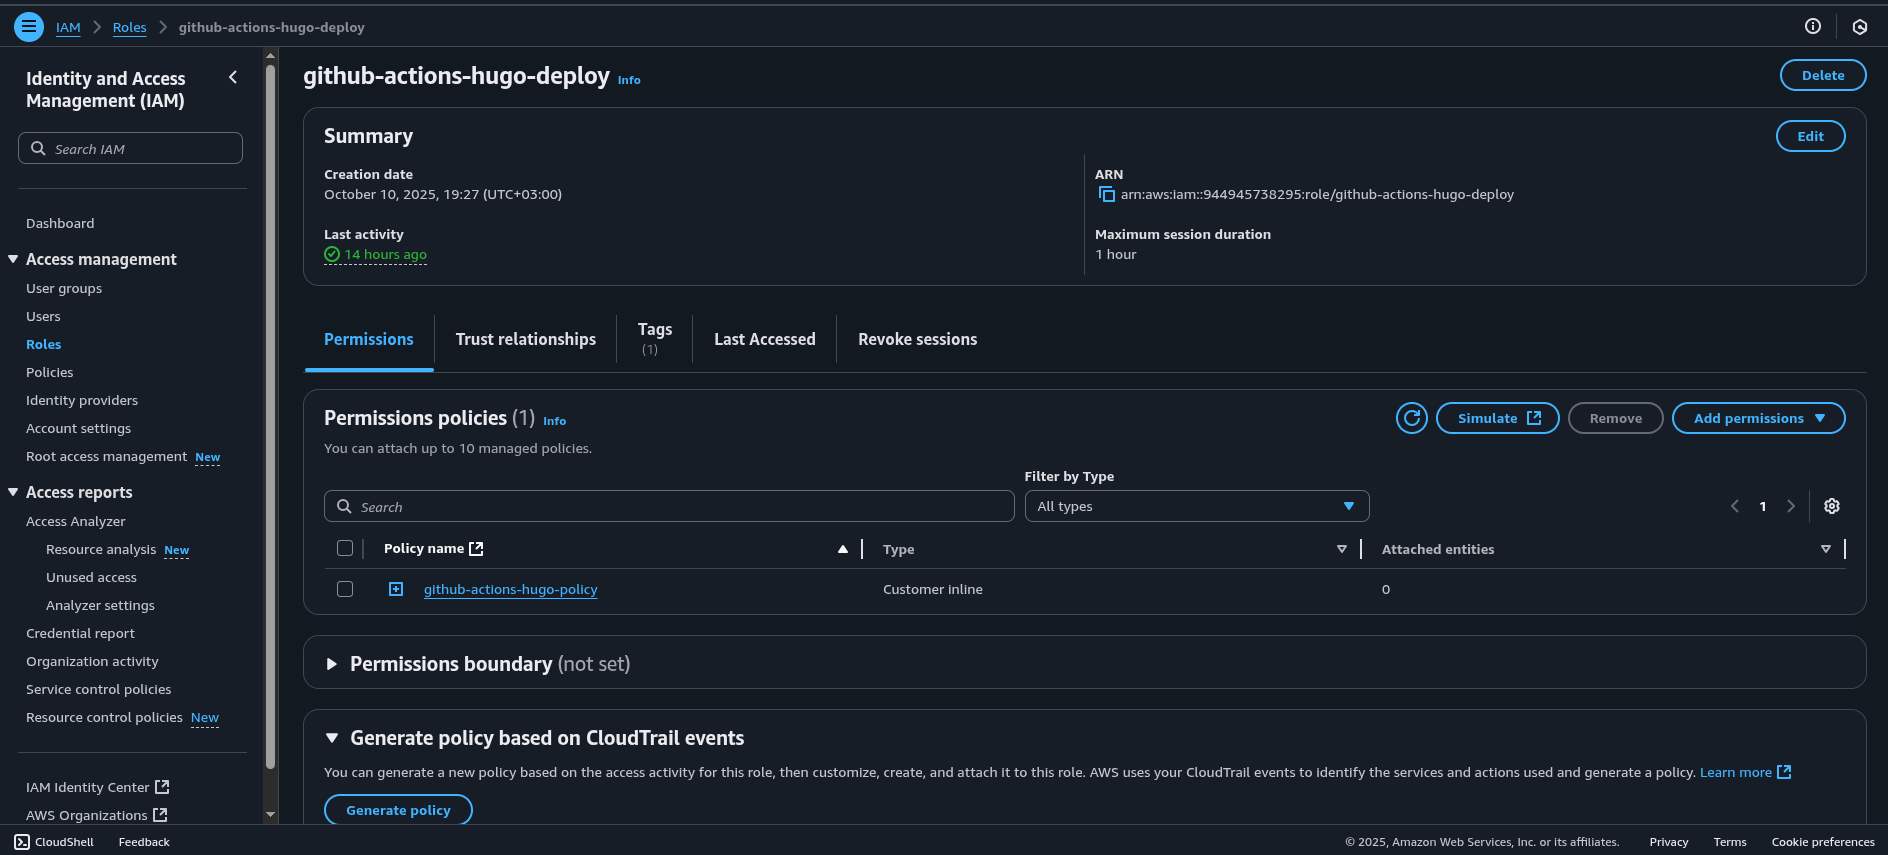
This ARN will be used later in the GitHub Actions workflow when configuring AWS credentials.
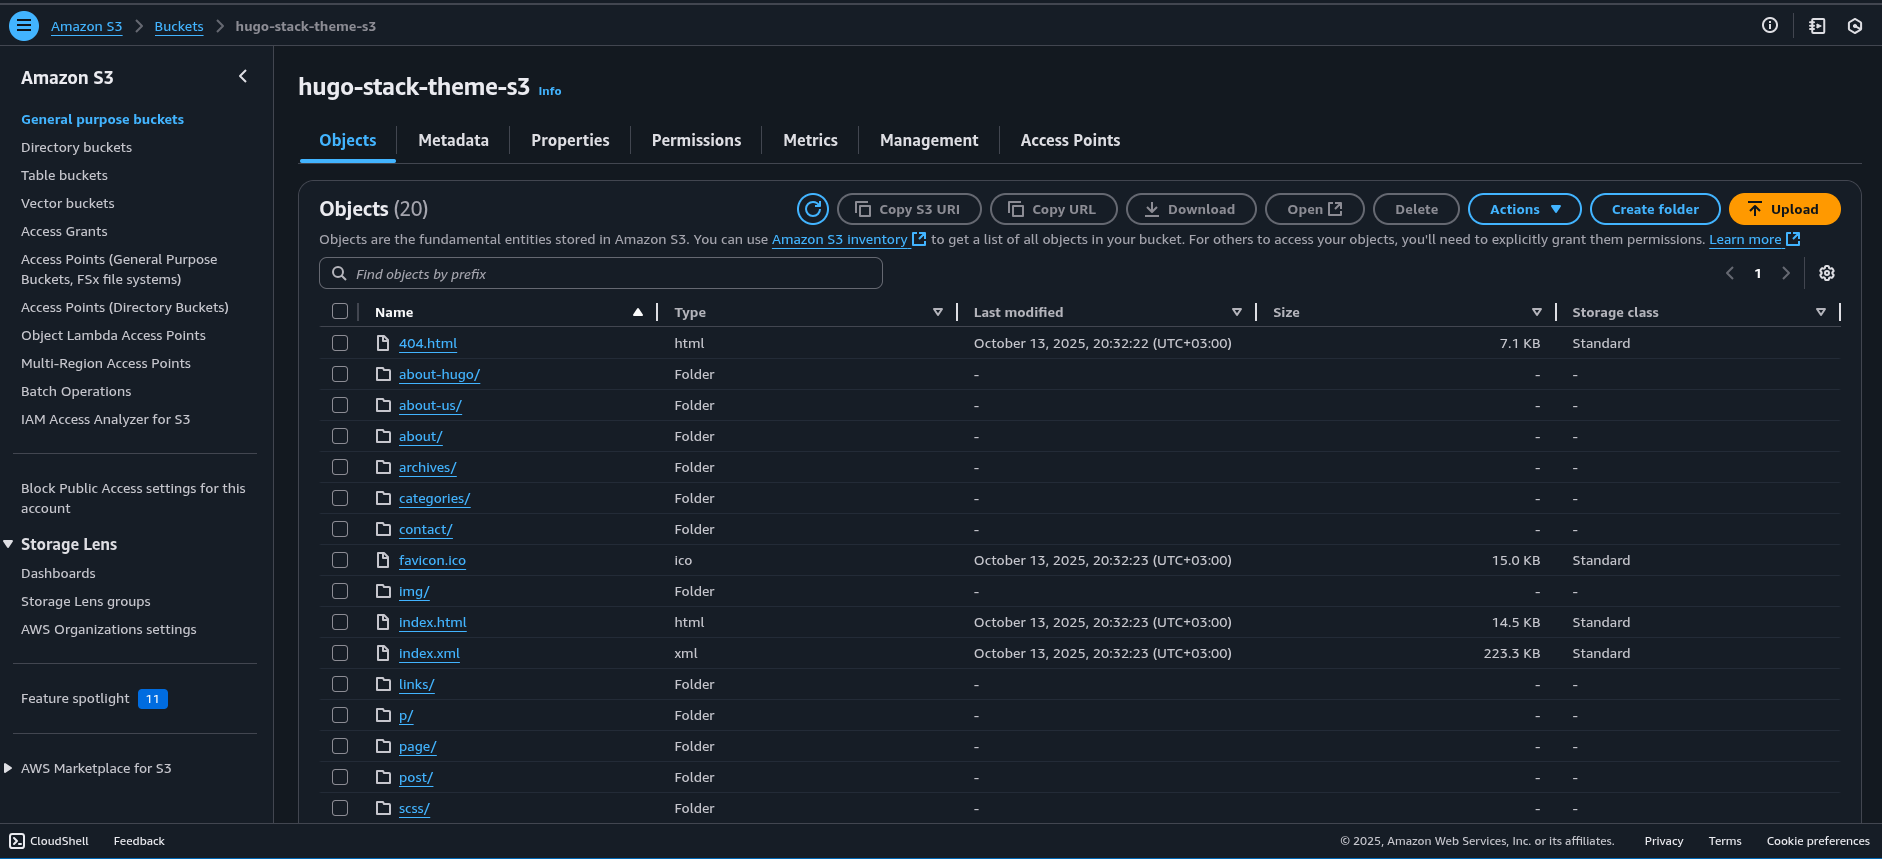
3.3. Creating the S3 Bucket for Hugo Site Hosting
With the security layer in place, we define an S3 bucket to host the static site generated by Hugo.
variables.tf (storage module):
| |
main.tf (storage module):
| |
Additional configurations are added to enhance security and compliance:
- Block public access
- Enable server-side encryption
- Restrict CloudFront access
main.tf (storage module):
| |
We also create a bucket policy allowing CloudFront to retrieve objects for content delivery:
main.tf (storage module):
| |
outputs.tf (storage module):
| |
3.4. Attaching IAM Policy to the GitHub Actions Role
Finally, we grant GitHub Actions permissions to upload, list, and delete objects in the S3 bucket.
main.tf (security module):
| |
This IAM policy ensures that the GitHub workflow can safely interact with the S3 bucket — uploading the Hugo build output during deployment.
3.5. Connecting the Terraform Outputs to GitHub Actions
With the Terraform configuration applied, AWS now has:
- A registered OIDC provider for GitHub
- An IAM role that can be assumed by your repository’s workflow
- A secure S3 bucket for static file hosting
From the Terraform outputs, we’ll use the following values in GitHub Actions secrets:
IAM_ROLE_ARN→ Output fromgithub_action_role_arnS3_BUCKET→ Output froms3_bucket_nameAWS_REGION→ Defined in Terraform or AWS provider
These secrets will allow GitHub Actions to assume the IAM role via OIDC and deploy directly to the bucket.
4. GitHub Actions Workflow: Building and Deploying the Hugo Site
With the AWS side configured, we can now implement the GitHub Actions workflow. This workflow uses the IAM role and S3 bucket created by Terraform to automatically build and deploy the Hugo site.
The workflow file (.github/workflows/build-hugo-site.yml) performs the following tasks:
- Trigger on Push: Runs on commits to the
devbranch. - Build Hugo: Compiles static files with the specified Hugo version.
- Assume IAM Role via OIDC: Authenticates securely with AWS.
- Deploy to S3: Uploads the
public/directory to the bucket. - Invalidate CloudFront Cache: Ensures global users see the latest version immediately.
| |
4.1. Workflow Overview
The workflow resides in .github/workflows/build-hugo-site.yml and performs these primary functions:
Triggering Conditions The workflow runs on a push to the
devbranch. This allows developers to test and validate changes in a development environment before they are promoted to production.Permissions Configuration Permissions are configured to allow GitHub Actions to generate an OIDC token (
id-token: write) and access repository contents (contents: read). The OIDC token is crucial because it enables secure, short-lived authentication with AWS — eliminating the need for static credentials.
4.2. Job: Build
The build job runs on an Ubuntu-based GitHub Actions runner (ubuntu-latest) and executes the core CI/CD steps.
1. Checkout Code
| |
This step retrieves the source code from the repository, including any submodules (such as Hugo themes), ensuring the full codebase is available for the build.
4.3. Setup Hugo
| |
Here we install the specific Hugo version required for the build. Using a defined version guarantees consistency between local and CI builds.
4.4. Build and Optimize Site
| |
This command generates the static site files in the public/ directory, removing unused assets (--gc) and minifying the output (--minify) for optimal performance.
4.5. Debugging Build Output
| |
A diagnostic step to inspect the build output before deployment. This helps identify missing or misconfigured assets early in the pipeline.
4.6. Configure AWS Credentials via OIDC
| |
This step allows GitHub Actions to assume an AWS IAM role securely via OpenID Connect (OIDC). Unlike static AWS keys, OIDC tokens are short-lived and automatically managed, improving security posture.
4.7. Verify AWS Connection
| |
This command confirms successful authentication with AWS and verifies which IAM role the workflow is using.
4.8. Deploy Static Files to S3
| |
Uploads all generated files from the public/ directory to the specified S3 bucket. The --delete flag ensures the bucket mirrors the latest build exactly by removing outdated files.
4.9. CloudFront Cache Invalidation
| |
Invalidates the CloudFront cache so users immediately see updated content after each deployment.
Why This Step Comes First
This workflow forms the foundation of the CI/CD pipeline. It ensures that:
- Hugo site builds can be automated and verified directly in GitHub.
- Secure OIDC-based authentication with AWS is already in place.
- The deployment process (S3 upload + CloudFront invalidation) is tested and working before Terraform provisions or manages any infrastructure.
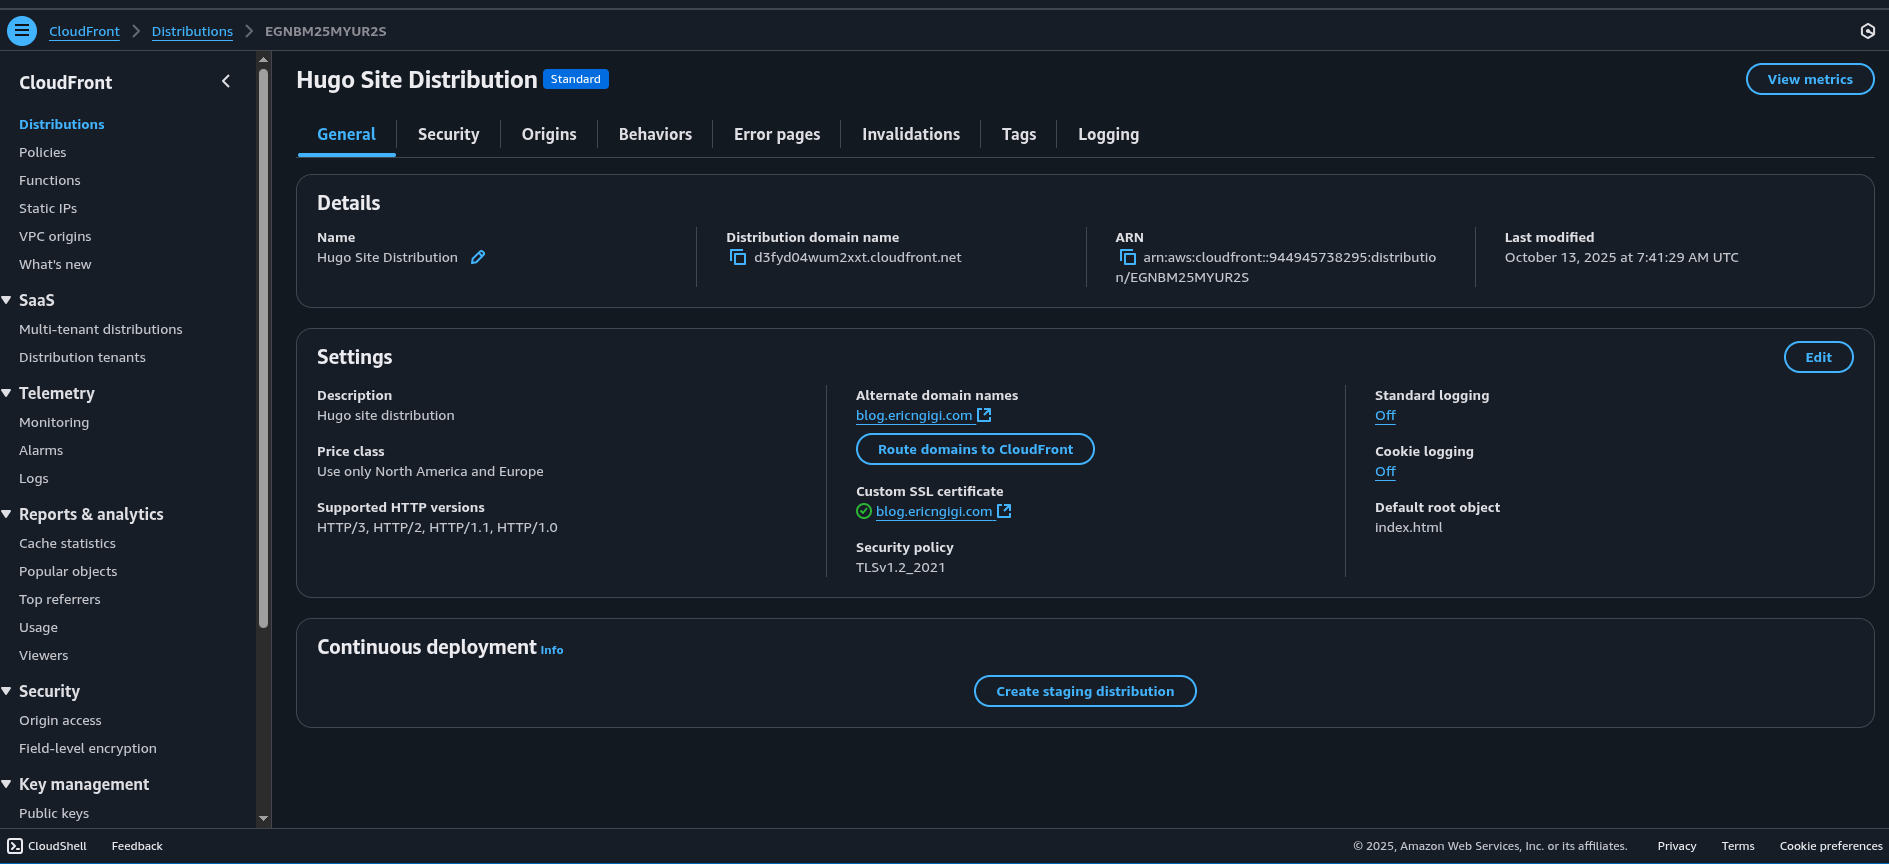
5. Setting Up the Network Module: CloudFront Distribution and SSL Certificate
With the static Hugo site now securely stored in Amazon S3, the next step is to distribute it globally and serve it over HTTPS. We achieve this using Amazon CloudFront — AWS’s Content Delivery Network (CDN) — and AWS Certificate Manager (ACM) for SSL/TLS certificates.
This section focuses on defining the network module in Terraform, which provisions the CloudFront distribution, origin access control (OAC), a function for clean URLs, and the SSL certificate required for HTTPS.
5.1. CloudFront Origin Access Control (OAC)
The first resource in this module is the Origin Access Control (OAC), which replaces the older OAI mechanism. It ensures CloudFront can securely fetch files from the S3 bucket using signed requests, while preventing direct public access.
variables.tf (network module):
| |
main.tf (network module):
| |
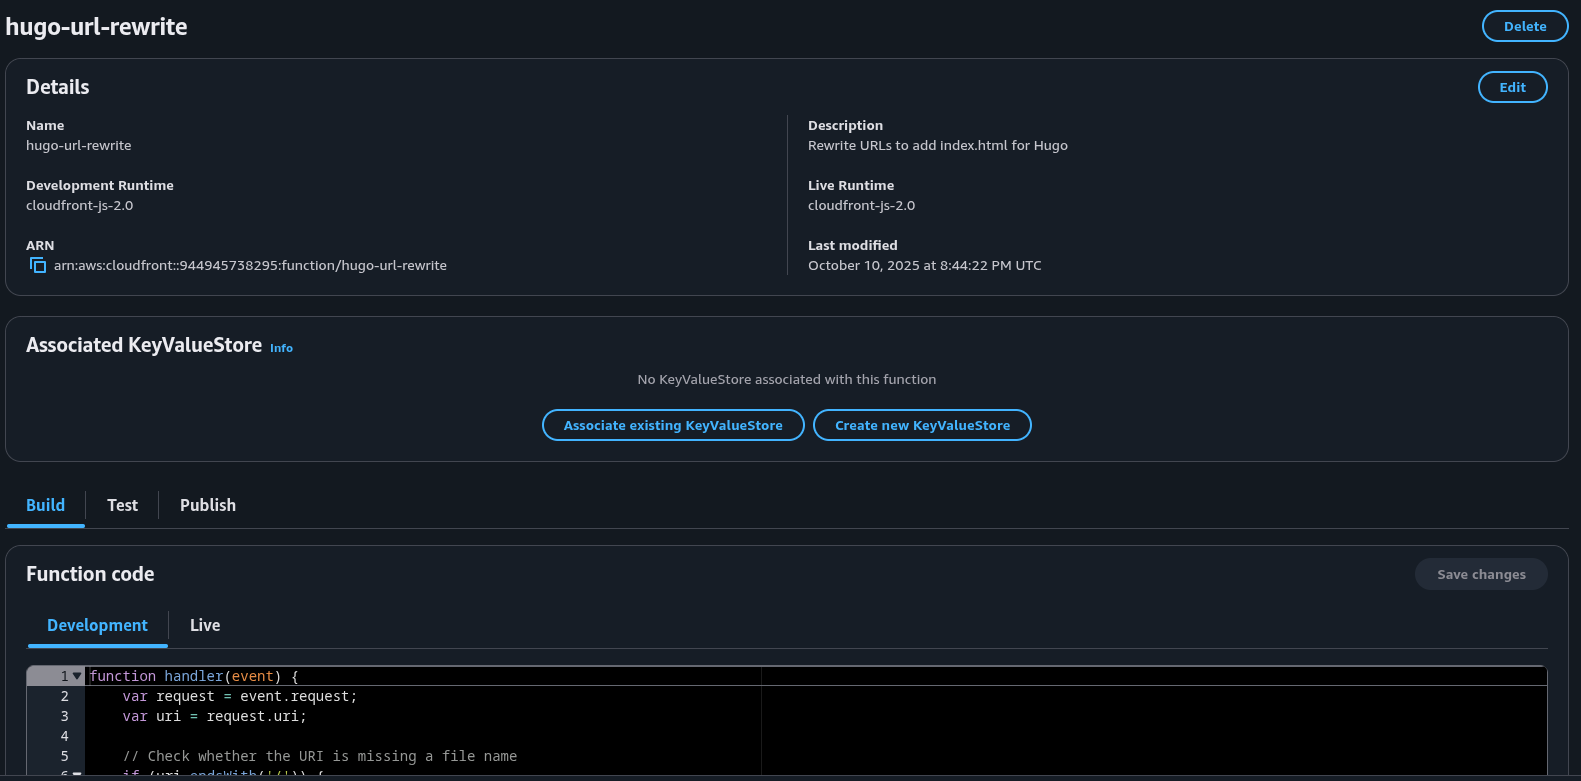
5.2. CloudFront Function for Clean URLs
Next, we define a CloudFront Function to handle “clean URLs.” Since Hugo generates content as index.html within folders, this function rewrites incoming requests to point to the correct file.
main.tf (network module):
| |
This allows users to access /about/ instead of /about/index.html, providing a cleaner and more professional URL structure.
5.3. CloudFront Distribution Configuration
The CloudFront distribution connects the CDN to the S3 origin, enforces HTTPS, enables caching, and associates the custom subdomain.
main.tf (network module):
| |
This configuration enforces HTTPS, compresses content for faster delivery, and integrates directly with ACM for secure SSL termination.
5.4. SSL Certificate with AWS Certificate Manager (ACM)
Before CloudFront can serve HTTPS traffic, a valid certificate must be provisioned. We use AWS Certificate Manager (ACM) for this, specifying DNS validation for automatic verification.
main.tf (network module):
| |
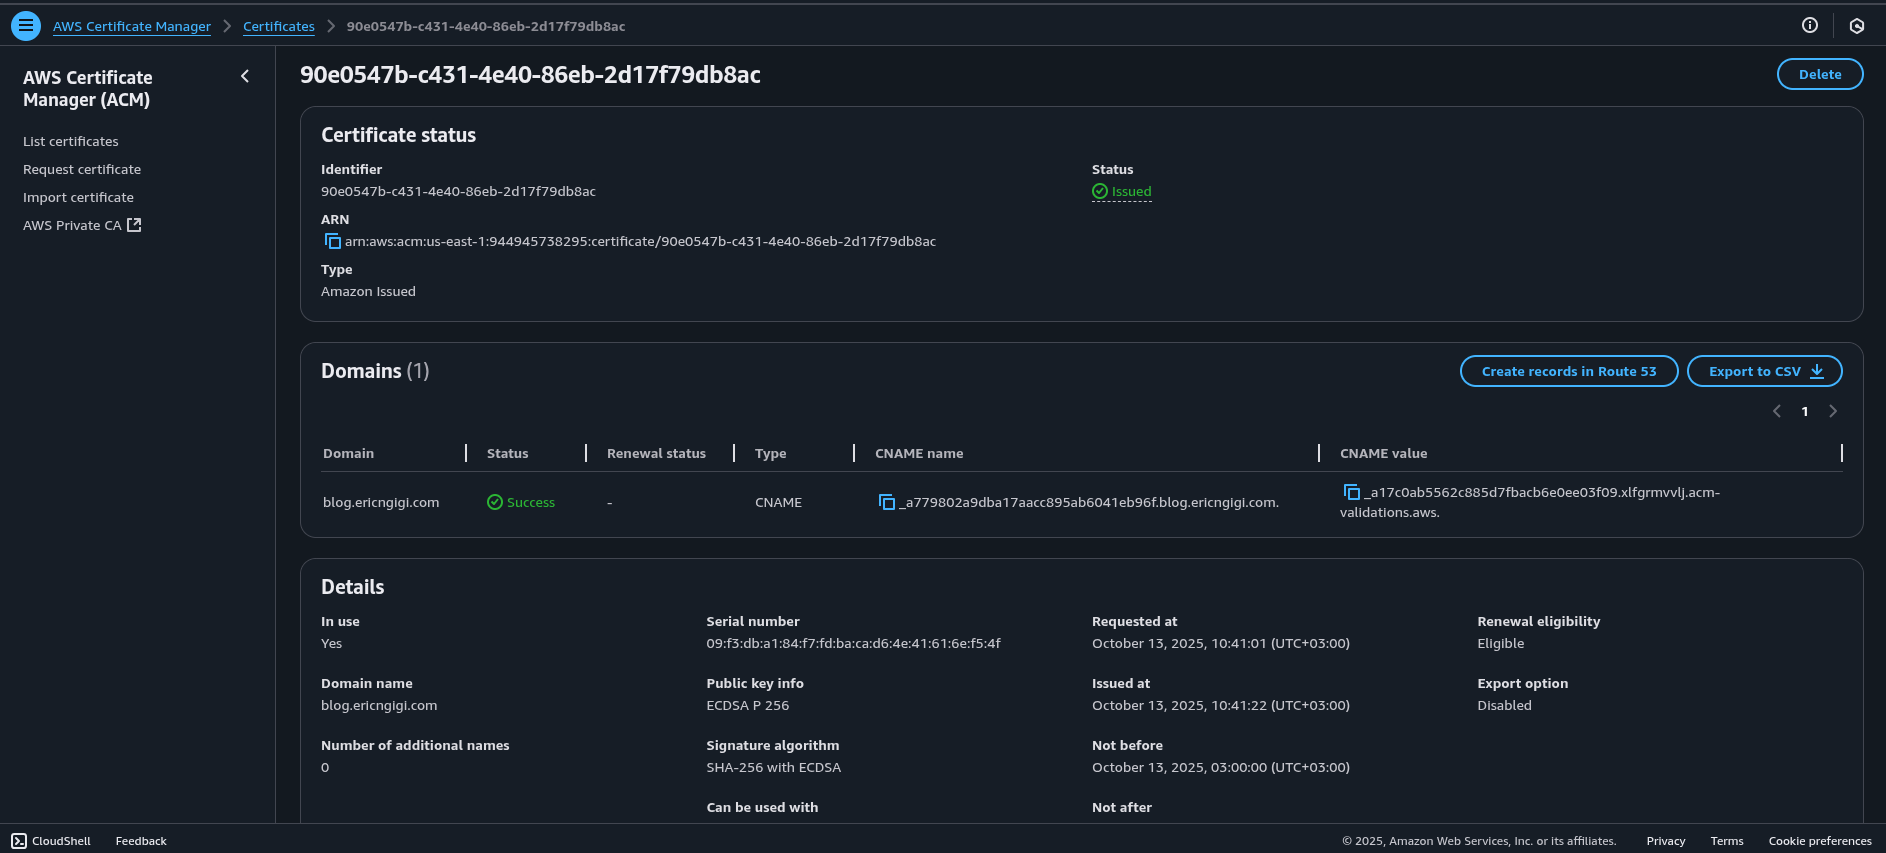
Note: For CloudFront, the ACM certificate must always be created in the us-east-1 region.
5.5. Network Module Outputs
Once the resources are deployed, several key outputs from the network module are required by other Terraform modules — including Cloudflare for DNS and validation setup.
outputs.tf (network module):
| |
These outputs provide critical data that downstream modules—like Cloudflare—will consume to finalize DNS setup and SSL validation. The acm_validation_options in particular are used to automatically create DNS records for certificate validation.
6. Configuring Cloudflare: DNS, SSL Validation, and Subdomain Binding
With the CloudFront distribution and SSL certificate in place, the final step is to make the site accessible through your custom domain. We’ll use Cloudflare to manage DNS records, handle ACM certificate validation, and securely bind the subdomain to the CloudFront URL.
This configuration allows Cloudflare to act as a DNS and security layer—enabling global caching, DDoS protection, and HTTPS enforcement on top of AWS CloudFront.
6.1. Fetching Zone Information
Before adding any DNS records, Terraform must retrieve details about your Cloudflare-managed domain. The following data block fetches the zone ID based on the domain name provided as a variable (var.domain_name):
variables.tf (cloduflare module):
| |
provider.tf (cloudflare module):
| |
main.tf (cloudflare module):
| |
Once the zone information is available, a secondary data source lists all existing DNS records in that zone. This is useful when validating or filtering existing records to avoid conflicts.
main.tf (cloudflare module):
| |
6.2. Automating ACM Certificate Validation
When AWS Certificate Manager issues an SSL certificate for CloudFront, it requires DNS-based validation.
To automate this process, Terraform dynamically creates the necessary DNS records in Cloudflare using the outputs from the network module (acm_validation_options).
main.tf (cloudflare module):
| |
Each record generated by this block corresponds to a validation entry required by ACM. Once these DNS records propagate, ACM automatically verifies domain ownership and issues the SSL certificate used by CloudFront.
6.3. Binding the Subdomain to CloudFront
After the SSL certificate is validated, we can now point the subdomain (e.g., blog.example.com) to the CloudFront distribution.
The record below creates a CNAME entry in Cloudflare that maps the subdomain to CloudFront’s domain name, enabling public access to the static site.
main.tf (cloudflare module):
| |
Here’s what’s happening:
type = "CNAME": Points your subdomain to the CloudFront distribution.proxied = true: Routes traffic through Cloudflare, enabling SSL, caching, and security features.depends_onensures the DNS validation records are created first, allowing ACM verification to complete before exposing the public domain.
7. Completing the CI/CD Pipeline
At this point, your Hugo static website is:
- Built automatically via GitHub Actions and deployed to Amazon S3.
- Distributed globally through AWS CloudFront with an ACM-managed SSL certificate.
- Connected to a custom subdomain via Cloudflare, ensuring secure and performant access.
This final step completes the end-to-end automation of your CI/CD pipeline—combining Terraform’s Infrastructure as Code, GitHub Actions’ automation, and the scalability of AWS and Cloudflare.